Thursday, December 26, 2013

merry christmas


Hope you all had a happy holiday with family and friends!
Our day was filled with love {and food}, and I couldn't feel more blessed this year.
I'll be back to recap Christmas soon, but until then... 

Let's do this, NYE!

Friday, December 20, 2013

friday things {and a quick dessert for two!}

We made it to Friday!
Finally.

I don't know about you guys, but I'm ready for a relaxing weekend at home.
This is the first weekend in the last, what, two months that we have zero plans.
And I. Can't. Wait.

Get me home and in my pjs, stat.

Oh yeah, and those of you who are prepping for two glorious weeks off work can shove it.
I'm talking to you, teacher friends!
And you people who are better at saving up vacation days than I am!

Okay, you don't really have to shove it.
But can you at least make and deliver treats to those of us that will still be at work?
It's only fair.

1.  Have you snagged your gold mug from Anthropologie yet?  I'm pretty certain I'm the last blogger on the planet to not own this mug, and I reaaaaally want it.  {hint to anyone who wants to buy me a Christmas gift...anyone?}

2.  Yesterday was mine and Joe's five year anniversary.  I can't believe how quickly these five years have flown, and how much we've grown as individuals and as a couple.  It's pretty incredible.  To celebrate, we went to Campania for dinner {amazing!!!} and cuddled up on the couch to watch The Holiday.  One thing I love about our anniversary being around Christmastime - Joe will watch a girly Christmas movie with me with minimal complaints.  It's my annual Christmas miracle!


He also sent me some pretty sweet prezzies while I was at work. <3

3.  My office's ugly sweater pot luck went well.  So much good food!  I decorated my green sweater dress to resemble a tree {the best I could, anyway...it's short-sleeve after all}.


I think it turned out pretty darn good for being a night-before-the-party craft!  For any of you that have parties like this to go to, all I did was raid the dollar store, buy some tacky decorations, and safety pin everything to my dress.  No hot glue required!

4.  Is it too late in the season to make cereal coated pumpkin french toast?  Because I've had this recipe saved on my desktop since October and am just now realizing that I have a free weekend. #pumpkinforever

5.  Two weeks ago, Kroger had a sale on those aluminum pie tins you can buy.  So, naturally, I stocked up.  I mean a girl never knows how many pies she's going to need to make.  Then, I discovered these.  And now I believe it was divine intervention that led me to Kroger that day.  Who wants cinnamon rolls?

6.  I'm officially obsessed with that One Direction song Story of My Life.  Sorry I'm not sorry.

7.  This weekend I really want to try this mulled wine recipe.  Joe is swearing he's had mulled wine before and hates it.  Someone please confirm that he must be wrong and needs to give it another shot.

8.  I'm also dying to try these gingerbread cookies.  I love the snowflake idea, but I'm having the worst time finding a cookie cutter I like.  Suggestions?

9.  Saved the best for last.  If you've been following this here blog for awhile, you know that my boyfriend has the biggest sweet tooth on the planet.  Particularly after I make something healthy for dinner, which I can't fault him for.  I'd like some chocolate after my broccoli too, thanks!  Over the past year, I've made these peanut butter chocolate chip ramekin cookies a good handful {or two} of times, and they always turn out great.  This is the best ramekin recipe I have found {they never come out dry!}, and it's totally perfect for the night where you want something sweet but really don't want to make an entire batch of cookies for yourself.


Ingredients:

4 tbsp butter
1/3 cup reduced fat peanut butter
1/4 cup white sugar
1/4 cup packed brown sugar
1 egg
splash of vanilla extract
1/2 tsp baking soda
1/4 tsp salt
3/4 cup (plus 2 tbsp) unbleached all-purpose flour

Directions:

Preheat oven to 350 degrees.  Lightly grease the inside of three small ramekins with cooking spray.
Combine the flour, baking soda, and salt in a bowl.  Whisk to incorporate and get rid of any lumps.
Combine butter, peanut butter, white sugar, and brown sugar in a bowl and beat on medium until incorporated, 1-2 minutes.
Add egg and vanilla to peanut butter mixture, and beat for another 15-30 seconds.
Slowly add the flour mixture, a little bit at a time, beating on low speed to incorporate.
Fill the ramekins halfway with dough, and bake for 18-20 minutes, until slightly brown on top but still doughy in the center.  A toothpick will still come out clean even though they're gooey, so that's a good way to check if they're done!
Sprinkle with chocolate chips {optional}, and serve immediately!

These are really easy to throw together and are a nice little indulgence on a weeknight when you're parked in front of the TV watching Biggest Loser and thinking how nice a cookie would be just about now.

No?  Just me?

Well regardless, I recommend you give these a try.
As soon as you're done eating gingerbread and sugar cookies and pecan pies, that is.

Have a great weekend!

Monday, December 16, 2013

white chocolate marshmallow pops

Saturday night, Joe and I went to a holiday party at my manager's house.

It was one of those great parties where there are tons of homemade appetizers, a roaring fire in the fireplace, and enough wine for a small army.
Plus, the most adorable little olive penguins made an appearance.


Are those not the cutest things you've ever seen?!

I left the party telling Joe that I can't wait for the day that we have a place big enough to entertain guests like that.
You know I've been itching to host a festive get-together!

However, since it's too late in the season to throw my own shindig, I begged my manager to at least let me make a holiday treat for hers.
She was reluctant but eventually realized I wasn't going to take no for an answer and {thankfully} conceded.

Marshmallow pops for everyone!

I saw my idol, Ree Drummond, make these on Food Network a few weeks back, and I remember specifically making a mental note to keep them in mind for the holidays.
They're a cinch to throw together, easily customizable, and they were a huge hit!
And by huge hit, I mean not just the children loved them.
Multiple strangers came up to tell me how much they enjoyed them.

Score!

via The Pioneer Woman

Ingredients:

1 bag of regular-sized marshmallows
1 package vanilla flavored almond bark
separate dishes filled with toppings - crushed peppermint, pretzels, sprinkles, candy, etc.
1 bag lollipop sticks

Melt almond bark using a double boiler until smooth {or pop in the microwave and stir every 30 seconds until melted}.
Dip lollipop stick into melted chocolate, then push into marshmallow, not quite going all the way through.
While chocolate is hardening, prep your toppings.
I put some peppermints in a Ziplock bag, used a rolling pin to smash them into tiny bits, and poured the bits into a small bowl.
I did the same thing with a handful of pretzels.
Of course, I had to do a bowl of sprinkles too.

Dip/roll each marshmallow into the melted chocolate, then tap on the side of the bowl to discard any excess.
Using your fingers, sprinkle on any topping that you like.
Don't be scared to mix and match!
Place the pop {stick side up} on a piece of parchment paper to harden.

After 5-10 minutes, they'll be ready to eat!
{...or to store in a large Tupperware dish for easy transport.}

It really doesn't get much easier than that.
And like I said, the people loved them.
Particularly the pretzel-covered ones, which is not super surprising since you can't beat a dessert that's salty and sweet.

I think these would also be really delicious sprinkled with crushed oreo, or dipped in dark chocolate and covered with crushed peanuts.
The sky's the limit really!

Got any fun plans this week?

Tonight we're going to one of my favorite restaurants, Spice, to celebrate a friend's promotion.
I see you, homemade bleu cheese chips!
Then, Thursday, my office is having an ugly sweater party/breakfast potluck.
I don't know which part I'm more excited about, making an ugly sweater to wear or eating all of the goodies at the potluck!

Thursday also happens to be mine and Joe's FIVE year anniversary.

Seriously, Father Time, slow down!

Wednesday, December 11, 2013

mexican stuffed peppers

Hi everyone!

After a nice little break that included a trip to Mexico, Thanksgiving, and the start of holiday party season, I'm back and ready to bake my life away for Christmas.
Get me in the kitchen with a rolling pin, stat!

Mexico was amazing {as I suspected it would be}, and now I'm convinced I want to do a tropical vacation every winter.


There's nothing like having a margarita by the pool in 90 degree weather in the middle of November.
One of my particularly favorite days was spent getting a couples massage with Joe in the morning and then napping by the pool all day.
I couldn't ask for a better way to recharge before the holidays than that, hands down.
Check out more pictures from our trip here if you're interested!

Since we've been back, it feels like we've been going nonstop.
Both of us are dying to have a weekend to just stay home, watch movies, and not change out of pajamas for two days straight.
Do you ever feel like that?

Even though we've had a ton of things to do, I came back from vacation on a mission.
A mission to eat healthy, and at home, as much as possible.
And so far, I've got to say, I've done pretty well.
I've meal planned like a crazy person, made lunches for both of us everyday, and kept the dining out exclusively for weekends.
My body is slowly, but surely, feeling better!

I've made stuffed peppers many times.
However, I've never made the same version twice.
I've just never quite found a recipe that I was in love with.
Last week, in all my meal planning glory, I decided to give it another shot.
And I'm so glad I did!
These turned out great.
The filling was substantial, a bit spicy, and seasoned with all of my favorite spices.
At one point, Joe was eating the leftover filling {there will be a tad bit leftover} straight out of the pan with a spoon.

That's how you know it's good.

adapted via Skinnytaste
Things you'll need:

1 garlic clove, minced
1/2 onion, diced
2-3 tbsp fresh cilantro, chopped
1 tsp extra virgin olive oil
1 lb lean ground turkey
1 tsp garlic powder
1 tbsp cumin
1/2 tsp cayenne pepper {optional}
salt, to taste
black pepper, to taste
3 large red bell peppers, cut in half the long way
1 1/4 cup low sodium chicken broth
1/2 cup tomato sauce
1 1/2 cup cooked rice
1/2 - 1/3 cup pepper jack cheese, shredded

Preheat oven to 400 degrees.
Saute onion, garlic, and cilantro in olive oil on medium heat for 1-2 minutes, until fragrant.
Add ground turkey, garlic powder, cumin, cayenne pepper, and a dash of salt and pepper.
Cook until meat is browned and cooked thoroughly.

Add tomato sauce and chicken broth.
Simmer on low for 4-5 minutes.
Stir in cooked rice.

While meat is simmering, slice peppers in half the long way, deseed, and rinse them out.
Lightly grease a baking dish with cooking spray, and place peppers face up like so.

Spoon meat mixture into each pepper.
Don't be afraid to really pile it in!
Splash a bit of chicken broth in the bottom of the pan, cover with foil, and bake for 30-35 minutes.

Sprinkle cheese on the cooked peppers, and serve immediately!

The great thing about these is that they are totally customizable.
If you don't like spice, leave out the cayenne.
If you're like me and are obsessed with cumin, add an extra dash.
Don't like pepper jack cheese?  Cheddar will work just fine!

Another option, if you're not into bell peppers, is to make the filling and use it for burritos.
That was actually a suggestion from Joe.
That's how into the filling he was.
{He did eat two of these though, pepper and all!  I was a proud girlfriend.}

I've finally found a stuffed pepper recipe that I can stick with!

PS - Happy birthday to my sweet friend, Ashley!  Hope your day was as great as you are! :)

Wednesday, November 20, 2013

the easiest salted caramel sauce

Usually when I write about a recipe, it's because I've read a lot about the dish at hand.
I read a ton of recipes, decide which ingredients I like/dislike, then add something to make it my own.
Which usually ends up being cumin, chili powder, hot sauce, or some combination of the three.
Let's be honest.

But sometimes I'll come across something that works perfectly the way it's written.
I won't be able to think of any way to improve it, which is weird, because making recipes my own is one of the things I love most about cooking.
Everything is so easy to personalize.

This salted caramel sauce is one of those things.
Before I made this, I had never attempted caramel before.
It always seemed so intimidating.
Especially because in the midst of research, there are always the people obsessed with candy thermometers.
"You must have a candy thermometer! Your caramel will burn! Don't even attempt this if you don't know the exact heat!!!"

Well I've got news for all of you.
I successfully made a delicious caramel sauce, sans thermometer, and it really wasn't hard!
So you can do it too, trust me!

I couldn't really get pictures of the process since it requires your full attention, but believe me when I say it's totally doable and worth the effort.
And there's only four ingredients.
So yeah, there's that.

tutorial via Two Peas & Their Pod
Things you'll need:

2 cups granulated sugar
1 1/2 sticks of butter, room temperature, cut into 1/2 inch cubes
1 cup heavy cream
1 tbsp sea salt {optional}

Before you get started, prep your ingredients.
Cube the butter.  Measure out the cream and sugar.
This will make it a lot easier to ensure the sugar doesn't burn.
Heat the sugar in a saucepan over medium-high heat until it begins to melt.
Begin whisking the sugar as it melts.
It will clump and stick to the whisk a bit, but keep going.  Eventually it will become smooth.
Once smooth, the original recipe says to stop whisking and swirl the pan around while the sugar continues to cook.
However, I just lifted the pan a bit and continued to whisk {since I don't have a thermometer to keep watch on the temp}.
Continue cooking the sugar until it turns a deep amber color {the color you want your caramel to be!}.

Once the sugar reaches the desired color, carefully whisk in the butter until melted.
Remove the pan from the heat, and slowly whisk in the heavy cream until completely incorporated and smooth.
Whisk in sea salt, if desired.
Allow caramel to cool in the pan for about 10 minutes, then transfer to a jar to cool to room temperature.
This recipe yields about two cups of caramel sauce.
I cooled 1 1/2 cups of it and served the other 1/2 cup immediately with mini wonton apple pies!

recipe found here

For any other caramel sauce, the only thing I would've thought to do is stir in some salt.
And, of course, Maria and Josh beat me to it.
This sauce is so delicious and will last in your fridge for about a month, which means you can drizzle it over brownies and dip your fruit in it every day if you want.
Not that I do that or anything.

What else is new?

Last weekend we had our annual cabin trip, which I would deem a success except for the tragedy that is Georgia Football.
It was so nice getting out of town for the weekend though.


The house we stayed at was three stories and beautiful.
Very cozy with tons of woodsy decor.


We spent the weekend having pomosas by the fire...


...watching the most devastating game I've seen in a long time...


...and trying to laugh off the heartbreak with card games and many {many} drinks.

Overall, not a terrible way to spend a weekend I'd say!

This weekend, Friday morning to be exact, Joe and I are off to Cancun for five days.
So this may or may not be the last post you see from me until we return next Wednesday.
Unless I bake a pie in my new pie dish tonight, which is totally possible.
I mean I do have all this extra caramel lying around.

Wednesday night feels like a good night for pie, am I right?

Friday, November 15, 2013

garlic lime pork chops

Last week Joe and I took a day off work to do something we never do.
Go on a date in the middle of the day!
It was such a great way to get a head start on the weekend and do an activity together.
The activity of choice this time?
Check out the Georgia Aquarium!


I had never been before, so I was really excited to check out everything it had to offer.
I won't lie to you, it turned out to be much more kid-centered than I expected.
Maybe I wasn't prepared because the last time I went to an aquarium I was a second grader?
Who knows.
However, it was still a lot of fun!


 Joe made some new friends...


...and so did I.
Now I officially want a penguin.
But since we couldn't take one home with us, Joe bought me the next best thing.


My favorite new stuffed animal, Nicholas the Christmas penguin!
He's been keeping us company on the nightstand for a week now, slowly easing us into the holiday spirit.

And speaking of holidays, can you believe it's almost Thanksgiving?
Where did November go?!

I've spent a lot of my time this month baking (shocker) and trying new dinner recipes.
I feel like I was in a dinner slump for almost a month and finally hit my wall of frustration.
Something had to be done.
So one Sunday, I set out to the grocery store (with no meal in mind) to wander around aimlessly, hoping to be inspired.

This time it just so happened to be pork chops, which I've never cooked before, believe it or not.
How I've gone this many years and avoided pork chops is beyond me, but I'm upset about it!
Because these chops turned out so delicious.
Totally up my alley, with tons of spice, garlic, and lime.
And they're made in a cast-iron skillet, my current favorite kitchen accessory.

If you're looking for a quick and easy dinner packed with flavor, this is what you want!

adapted/inspired by Skinnytaste
Things you'll need:

3 medium-sized boneless pork chops
4 cloves garlic, minced
3 tsp cumin
3 tsp chili powder
3 tsp paprika
1 lime, juice and zest of
sea salt
black pepper
1 tbsp olive oil

Season chops on both sides with cumin, chili powder, paprika, salt, and pepper.
I sprinkled each side with salt and pepper, then used about 1/2 tsp (give or take) of each spice on each side of the chop.
(If you don't love spice, do less!  These are totally adaptable.  I just really love heavy seasoning.)
In a bowl, toss chops with garlic, lime juice, and lime zest.
Marinate, covered, in the fridge for 2 to 2.5 hours.
You can really marinate these as long or as short as you want, but I'd recommend at least 30 minutes if possible.
I did mine for 2.5 hours, and I could taste all of the flavors beautifully.

Preheat oven to 400 degrees.
In a cast-iron skillet, heat oil over medium-high heat.
Sear pork chops for 3-4 minutes on each side, until golden brown.
Transfer skillet to the oven for 6-10 minutes, until pork chops are cooked thoroughly.
Serve and enjoy!

It's that easy.
I threw mine in the fridge, went to a yoga class, and when I got home dinner was ready in 20 minutes.
Perfect.
I served these on top of some lime rice (white rice cooked normally, then tossed with the juice of a whole, fresh lime), and they were amazing.
Finishing off meat in the oven is so easy and SO worth it.
They weren't dry at all and had amazing flavor thanks to the simple marinade.
And FYI, these would also be amazing on the grill...because everything is amazing on the grill.

So, if you want to spice up your dinner routine, or you're tired of the usual boring pork chop, these are your remedy.
I wouldn't steer you wrong.

What are you doing this weekend?

This afternoon, Joe and I are headed to Blue Ridge with some friends for our annual cabin trip!
The girls and I have spent our week meal planning, grocery shopping, and picking out as many cocktails as we can.
Up first on the list to try: boozy apple cider.

I cannot wait!

Have a great weekend!

Thursday, October 31, 2013

spooky cinnamon apple chips

Okay, there's nothing really spooky about these.
Except that I'm posting them on Halloween, so I'm calling them spooky.
They're actually not scary in the least and super delicious!

On Friday, I got a text from Joe.
"I got you a present."

Is that, or is that not, one of the most exciting texts you can receive?
Who doesn't like surprise presents?
And my boy knows me well, because the present just happened to be a mandolin!

No, not the instrument.
The slicer.
{I can't tell you how many people have asked me about the instrument, ha.}

So, it was only natural that I spent the weekend slicing as many things as possible to see what this baby could do.
Oranges?  Check.
Potatoes {of the french fry and hashbrown variety}?  Check.
Apples on apples on apples?  Check, check, check.

When I wasn't slicing things in my spare time, Joe and I were making the trek to Scottsdale Farms to have breakfast at Bella Luna Cafe and pick out the biggest pumpkins we could possibly find.
True story.


The sun was bright that morning, but we did it!

This year I ended up drawing my own stencil {terrifying, btw!} and this is what I came out with.


Broken in a few spots, but not too shabby for a homemade owl I suppose.
Next year I'll be returning to pre-made stencils, thankyouverymuch.

So, the apple chips.
Preface to these real quick: a reader reached out to me about the type of cinnamon I've been using {cassius cinnamon, what they have in the grocery store} and offered to send me a sample of some ceylon cinnamon.
It's supposed to be a lot better for you and also has a milder taste than the store-bought stuff.
There will be a post on this coming soon for anyone that's interested!

recipe adapted via Sally's Baking Addiction
Things you'll need:

2-3 apples {I used red delicious, but any kind will do!}
2 tsp granulated sugar
2 tsp cinnamon

*Note: This did not photograph well...my apologies in advance! Feel free to pop by Sally's blog for better photos! :)

Line a baking sheet with parchment paper or aluminum foil.
{If using foil, lightly spray with cooking spray.}
Slice apples with a mandolin as thinly as possible.
If you don't have a mandolin, this can absolutely be done by hand.
It will just a take a bit longer!
Lay slices out in a single layer on your baking sheet.

Mix together cinnamon and sugar in a small bowl.
Lightly sprinkle over apples.
I only sprinkled one side, but you could definitely flip them over and do both if it strikes your fancy!

The hardest part of these apples?
The waiting.
Bake at 200 degrees for one hour.
Flip slices and bake for another hour.
Turn off the oven, and let the apple chips cool in the oven for another hour.
This last hour is crucial, as that's when they will crisp up and become actual chips!

Store in an airtight container at room temperature.
I took mine to work as a mid-morning snack, and it took everything in me not to eat them all in one sitting.
So addicting!

Now that I've made these, I have the "fruit chip" bug.
I want to make everything into a baked chip these days.
Banana chips are definitely next on my list!

Do you have any fun plans for Halloween?

Tonight we are heading over to a friend's house for a little get together to have drinks, give out candy to the adorable neighborhood kids, and eat one {or three} Reese's-filled cupcakes.
Don't worry, they will be adorned with Halloween goodies.


We'll also be giving our pup lots of hugs and kisses, because on this day two years ago we adopted him from the Atlanta Humane Society!
I cannot believe it's been two whole years.
What did we do before we had a pup to greet us at the door when we get home, to eat all the food dropped on the floor, and to hog the entire bed at night?!

Happy Halloween!

Friday, October 25, 2013

traditional salt-and-butter pretzels - happy blogiversary!

I can't believe I started this blog an entire year ago.
It feels like yesterday I was writing this post and trying to decide how I was going to do this without getting overwhelmed.
And here I am, a full year later, twisting up pretzels like a pro.

For those of you that have stuck with me throughout this year, happy anniversary!
You have taught me so much, and I'm looking forward to another year of experimenting with you!

If you would have told me a year ago I'd be making pretzels once a week on average, I would've told you that you were crazy.
Had lost your mind, really.

Bread has always been really intimidating to me.
I'm the "dash of this, sprinkle of that" kind of girl, so anything that requires exact measurements tends to scare me a bit.
Once I even managed to ruin a loaf of French bread I was making in a breadmaker.

That's right.
I somehow botched a recipe that calls for a machine to do 99% of the work.

But, as I've gotten more comfortable in the kitchen, I've been more and more intrigued by the science behind baking bread.
I haven't done anything really fancy by any means, but I have gotten comfortable enough in my pretzel-making skills to finally share them with you!

I was inspired to give pretzels a try by my newest blog friend, Candace, and her recipe for Pumpkin Praline Pretzels.
Sounds right up my alley right?

I, however, am the only pumpkin-lover in my household, and since I don't need to eat eight full-sized pretzels on my own, I opted for the traditional route.
Butter and salt those babies up.

recipe adapted originally via
Things you'll need:

1 packet yeast {or 2 1/4 tsp if you have a jar of it like I do}
1 1/2 cups warm water
1 tsp salt
1 tbsp light brown sugar
3 1/2 - 4 1/4 cups unbleached all-purpose flour
9 cups water
2/3 cup baking soda
2 tbsp butter, melted
sea salt

Preheat oven to 425 degrees.
Line a baking sheet with aluminum foil and lightly coat with cooking spray.
Whisk together yeast and warm water, until yeast has completely dissolved.
Whisk in salt and brown sugar.

One cup at a time, add flour to yeast mixture.
You don't want the dough to be sticky.
Usually this takes me about 4 cups of flour, maybe a tiny bit less.

Knead the dough for about 3 minutes.
Cut dough into 8-10 even-sized balls, depending on how large you want your pretzels to be.
I cut my dough into 8 balls, but next time I'm thinking of trying to make smaller, mini pretzels!
Roll each ball into a rope about a foot long, and form your pretzels.
Sally's Baking Addiction has a great picture example of how to do this if you're having trouble.

Bring water and baking soda to a boil, stirring to make sure baking soda dissolves.
Using a large slotted spoon {or a spatula}, dip the pretzels one by one into the baking soda bath.

Let them soak for about 30 seconds, then take lift them out, shake off any excess water, and place them on the foil-lined baking sheet.

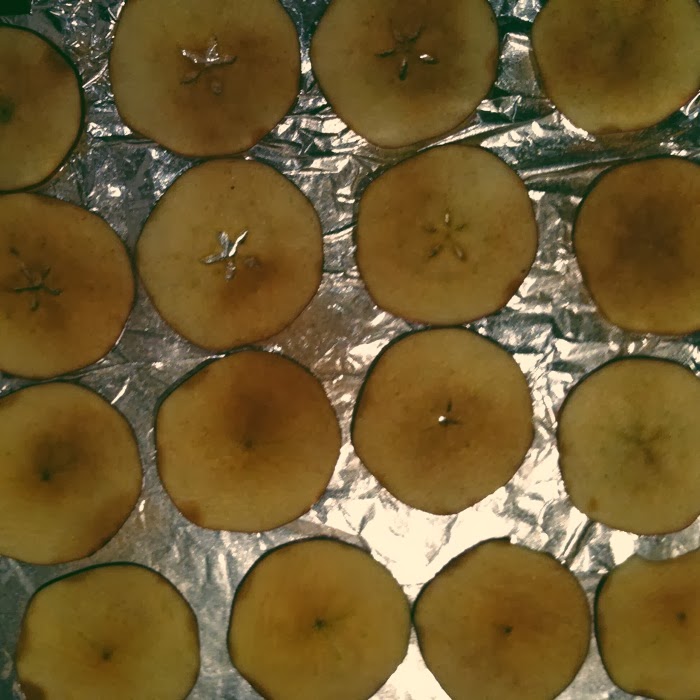
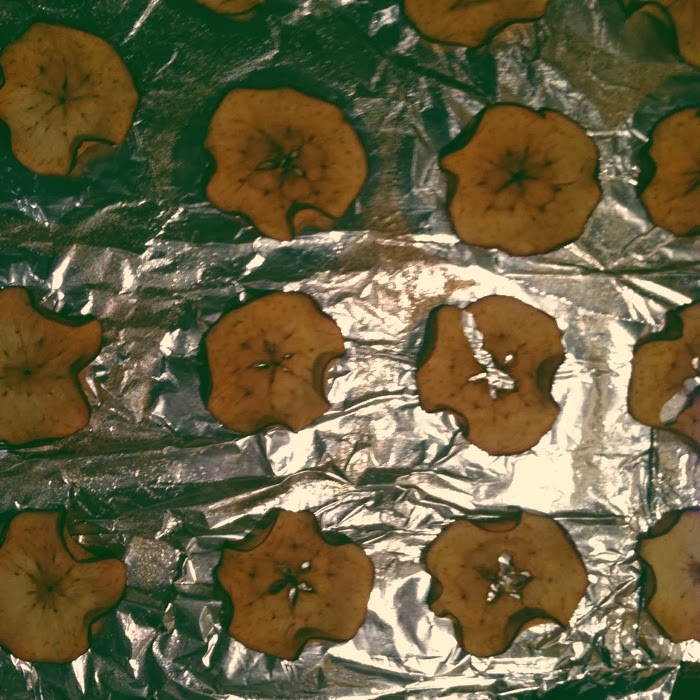
This is what they should look like post-baking soda bath.
Place in the oven for 10 minutes.
While they're baking, melt butter.

After 10 minutes, brush them with butter using a pastry brush and sprinkle on sea salt {or rock salt, if you have it on hand}.
Put them back in the oven for an additional 5 minutes.
Serve immediately!

Does it get any easier than that?
For a homemade pretzel?
I don't think so.

Call me crazy, but I kind of have fun making these.
They don't take long at all, and the kneading is actually quite relaxing.
Instead of running off my stress, I like to knead it out.

I probably need to work on that.

Nonetheless, I recommend you give these a try this weekend.
You will not be disappointed.
They are becoming a Wednesday night tradition at our place.
The perfect snack to eat while watching the Survivor contestants eat rice and vote each other out of their respective tribes.
And let's be honest, food-related traditions are the best kind of traditions.

What are you up to this weekend?

Joe is running a 5K, and then we're heading to a pumpkin patch for lunch at Bella Luna Cafe and picking out pumpkins to carve!
Cool weather is among us, and I'm ready to get my carve on.
Funny design ideas will be happy accepted, if you have any!

TGIF!