Thursday, October 31, 2013

spooky cinnamon apple chips

Okay, there's nothing really spooky about these.
Except that I'm posting them on Halloween, so I'm calling them spooky.
They're actually not scary in the least and super delicious!

On Friday, I got a text from Joe.
"I got you a present."

Is that, or is that not, one of the most exciting texts you can receive?
Who doesn't like surprise presents?
And my boy knows me well, because the present just happened to be a mandolin!

No, not the instrument.
The slicer.
{I can't tell you how many people have asked me about the instrument, ha.}

So, it was only natural that I spent the weekend slicing as many things as possible to see what this baby could do.
Oranges?  Check.
Potatoes {of the french fry and hashbrown variety}?  Check.
Apples on apples on apples?  Check, check, check.

When I wasn't slicing things in my spare time, Joe and I were making the trek to Scottsdale Farms to have breakfast at Bella Luna Cafe and pick out the biggest pumpkins we could possibly find.
True story.


The sun was bright that morning, but we did it!

This year I ended up drawing my own stencil {terrifying, btw!} and this is what I came out with.


Broken in a few spots, but not too shabby for a homemade owl I suppose.
Next year I'll be returning to pre-made stencils, thankyouverymuch.

So, the apple chips.
Preface to these real quick: a reader reached out to me about the type of cinnamon I've been using {cassius cinnamon, what they have in the grocery store} and offered to send me a sample of some ceylon cinnamon.
It's supposed to be a lot better for you and also has a milder taste than the store-bought stuff.
There will be a post on this coming soon for anyone that's interested!

recipe adapted via Sally's Baking Addiction
Things you'll need:

2-3 apples {I used red delicious, but any kind will do!}
2 tsp granulated sugar
2 tsp cinnamon

*Note: This did not photograph well...my apologies in advance! Feel free to pop by Sally's blog for better photos! :)

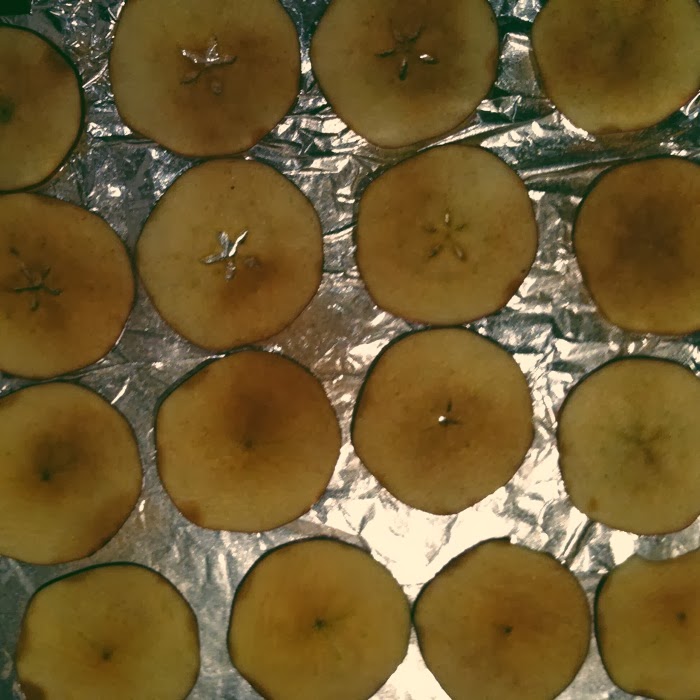
Line a baking sheet with parchment paper or aluminum foil.
{If using foil, lightly spray with cooking spray.}
Slice apples with a mandolin as thinly as possible.
If you don't have a mandolin, this can absolutely be done by hand.
It will just a take a bit longer!
Lay slices out in a single layer on your baking sheet.

Mix together cinnamon and sugar in a small bowl.
Lightly sprinkle over apples.
I only sprinkled one side, but you could definitely flip them over and do both if it strikes your fancy!

The hardest part of these apples?
The waiting.
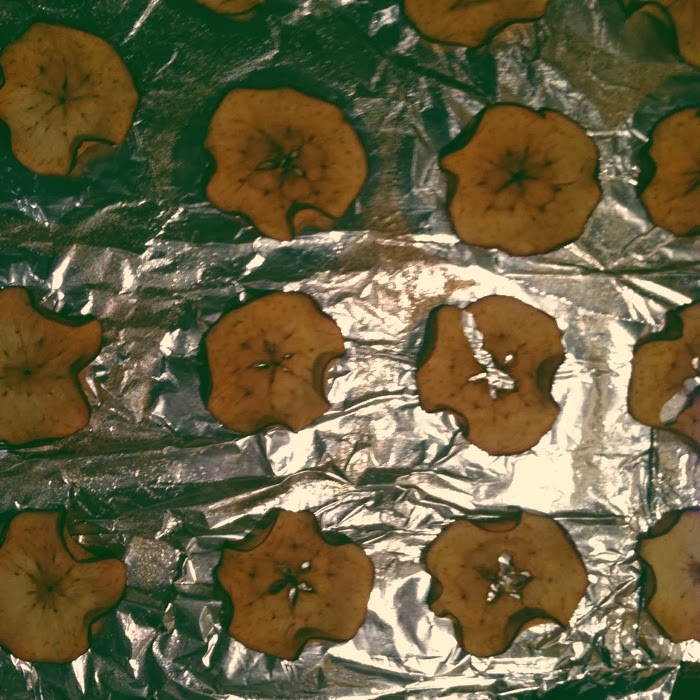
Bake at 200 degrees for one hour.
Flip slices and bake for another hour.
Turn off the oven, and let the apple chips cool in the oven for another hour.
This last hour is crucial, as that's when they will crisp up and become actual chips!

Store in an airtight container at room temperature.
I took mine to work as a mid-morning snack, and it took everything in me not to eat them all in one sitting.
So addicting!

Now that I've made these, I have the "fruit chip" bug.
I want to make everything into a baked chip these days.
Banana chips are definitely next on my list!

Do you have any fun plans for Halloween?

Tonight we are heading over to a friend's house for a little get together to have drinks, give out candy to the adorable neighborhood kids, and eat one {or three} Reese's-filled cupcakes.
Don't worry, they will be adorned with Halloween goodies.


We'll also be giving our pup lots of hugs and kisses, because on this day two years ago we adopted him from the Atlanta Humane Society!
I cannot believe it's been two whole years.
What did we do before we had a pup to greet us at the door when we get home, to eat all the food dropped on the floor, and to hog the entire bed at night?!

Happy Halloween!

Friday, October 25, 2013

traditional salt-and-butter pretzels - happy blogiversary!

I can't believe I started this blog an entire year ago.
It feels like yesterday I was writing this post and trying to decide how I was going to do this without getting overwhelmed.
And here I am, a full year later, twisting up pretzels like a pro.

For those of you that have stuck with me throughout this year, happy anniversary!
You have taught me so much, and I'm looking forward to another year of experimenting with you!

If you would have told me a year ago I'd be making pretzels once a week on average, I would've told you that you were crazy.
Had lost your mind, really.

Bread has always been really intimidating to me.
I'm the "dash of this, sprinkle of that" kind of girl, so anything that requires exact measurements tends to scare me a bit.
Once I even managed to ruin a loaf of French bread I was making in a breadmaker.

That's right.
I somehow botched a recipe that calls for a machine to do 99% of the work.

But, as I've gotten more comfortable in the kitchen, I've been more and more intrigued by the science behind baking bread.
I haven't done anything really fancy by any means, but I have gotten comfortable enough in my pretzel-making skills to finally share them with you!

I was inspired to give pretzels a try by my newest blog friend, Candace, and her recipe for Pumpkin Praline Pretzels.
Sounds right up my alley right?

I, however, am the only pumpkin-lover in my household, and since I don't need to eat eight full-sized pretzels on my own, I opted for the traditional route.
Butter and salt those babies up.

recipe adapted originally via
Things you'll need:

1 packet yeast {or 2 1/4 tsp if you have a jar of it like I do}
1 1/2 cups warm water
1 tsp salt
1 tbsp light brown sugar
3 1/2 - 4 1/4 cups unbleached all-purpose flour
9 cups water
2/3 cup baking soda
2 tbsp butter, melted
sea salt

Preheat oven to 425 degrees.
Line a baking sheet with aluminum foil and lightly coat with cooking spray.
Whisk together yeast and warm water, until yeast has completely dissolved.
Whisk in salt and brown sugar.

One cup at a time, add flour to yeast mixture.
You don't want the dough to be sticky.
Usually this takes me about 4 cups of flour, maybe a tiny bit less.

Knead the dough for about 3 minutes.
Cut dough into 8-10 even-sized balls, depending on how large you want your pretzels to be.
I cut my dough into 8 balls, but next time I'm thinking of trying to make smaller, mini pretzels!
Roll each ball into a rope about a foot long, and form your pretzels.
Sally's Baking Addiction has a great picture example of how to do this if you're having trouble.

Bring water and baking soda to a boil, stirring to make sure baking soda dissolves.
Using a large slotted spoon {or a spatula}, dip the pretzels one by one into the baking soda bath.

Let them soak for about 30 seconds, then take lift them out, shake off any excess water, and place them on the foil-lined baking sheet.

This is what they should look like post-baking soda bath.
Place in the oven for 10 minutes.
While they're baking, melt butter.

After 10 minutes, brush them with butter using a pastry brush and sprinkle on sea salt {or rock salt, if you have it on hand}.
Put them back in the oven for an additional 5 minutes.
Serve immediately!

Does it get any easier than that?
For a homemade pretzel?
I don't think so.

Call me crazy, but I kind of have fun making these.
They don't take long at all, and the kneading is actually quite relaxing.
Instead of running off my stress, I like to knead it out.

I probably need to work on that.

Nonetheless, I recommend you give these a try this weekend.
You will not be disappointed.
They are becoming a Wednesday night tradition at our place.
The perfect snack to eat while watching the Survivor contestants eat rice and vote each other out of their respective tribes.
And let's be honest, food-related traditions are the best kind of traditions.

What are you up to this weekend?

Joe is running a 5K, and then we're heading to a pumpkin patch for lunch at Bella Luna Cafe and picking out pumpkins to carve!
Cool weather is among us, and I'm ready to get my carve on.
Funny design ideas will be happy accepted, if you have any!

TGIF!

Thursday, October 24, 2013

a nashville recap + easy spinach risotto

You guyyyyys.

I've been so busy lately.
October has by far been the busiest month of my year.
Between birthdays, company events, college football, and a brief trip out of town, I feel like I haven't had time to breath.
Or blog.
Hence the silence post-birthday.

But somehow I have found the time to squeeze in a few homemade meals {and baked goods, of course} between everything going on this month.

Before I get to that, though, let me take a quick second to tell you about a quick love affair I had.
Nashville.
Seriously, love is kind of an understatement.
I had been wanting to go there for as long as I could remember, and it just so happened my closest girlfriend, Kayla, and I were coming up on our "10 years of friendship" anniversary.
"Friendaversary" as we so lovingly called it.
So what better reason to pack up the car and get the heck out of town than that?
Off to Nashville we went.

{Now would be a good time to prepare for a photo dump.}

While we were there, we ate a lot of amazing food.

Captain Crunch french toast at Mad Donna's, with 2-for-1 mimosas!
funnel cake at Oktoberfest in Germantown
We spent our nights checking out as many famous bars as possible downtown.

view from Honky Tonk Central
This was my favorite part.
Tootie's will forever be on my top 5 favorite bar list, despite the huge crowd.
I don't even really like country music, but I may now be a convert.
The atmosphere was just so friendly and happy!

Of course, we had to take a break from sight-seeing and bar-hopping to watch the Dawgs at a local pub.


They ended up losing {let's just pretend it's not football season anymore, thanks}, but it was a great time!

So great, in fact, that on the way home we decided we weren't ready for the trip to be over and made the most touristy stop of the whole weekend....


I can't believe I live two hours from Rock City and had never seen it before.
It was quite a sight.


Sometimes a girls' trip is just what you need to get you back on track.
Nashville, I will be back.
I can guarantee you that.

So, now to the food.

Today, instead of shoving sugar in your face per usual, I have a super easy spinach risotto I found via Williams-Sonoma that was incredibly simple to put together and tasted delicious.
For anyone that's a risotto first-timer, this is the recipe for you.
{I had never made risotto before, and this was a solid first effort.  I definitely recommend it!}

recipe adapted from Williams-Sonoma
Things you'll need:

6 cups low-sodium chicken stock
3 tbs olive oil
1/2 yellow onion, diced
1 lb. fresh spinach, roughly chopped
2 cups Arborio rice {I couldn't find that, so I used a store brand medium-grain rice}
2 tbs butter
2-4 tbs grated Parmesan
sea salt, to taste
black pepper, to taste

In a small saucepan, bring chicken stock to a simmer and maintain on low heat.
In a deep skillet, sauté onion in olive oil for 3-4 minutes, until slightly tender.
Add chopped spinach, reduce heat to low, cover, and cook for 4-5 minutes, until tender.
Transfer onion/spinach mixture to a bowl and set aside.

Add a bit more olive oil if necessary.
Add rice to the pan and stir until coated with oil and slightly translucent, 3-4 minutes.
{This would be where you'd want to add some wine, if you were going to.  I was out {!!!} so I couldn't. Shame.}

Begin adding stock one ladle at a time.
Stir constantly, and wait until stock is almost completely absorbed before adding more.
Continue this process until all stock has been added except 1/4 cup.

After about 18 minutes, once all the stock except 1/4 cup has been added, stir in the onion/spinach mixture.
Cook for 2-3 minutes until onion/spinach mixture is heated through.
Remove from heat.
Add butter, Parmesan, salt, pepper, and leftover stock.
Serve immediately!

This was so easy, I'm a little surprised I haven't attempted it before now.
I think the word "risotto" just sounds intimidating.
But I promise, it's not.
So keep calm and risotto on, or something like that.

This would be delicious with some shrimp stirred in to make it more substantial.
I served it with tilapia, so I had no need for the extra protein.
It's totally an option, though, if you're into one-pan meals!
Which, let's be honest, who isn't?

Up next on the blog, we'll be talking about my new hobby this fall.
Kneading any and all bread dough.


It's almost Friday!

Thursday, October 10, 2013

reese's-filled cupcakes

Birthdays are so fun.


Joe sent me the most beautiful flowers this year.
And if you know me, you know I absolutely love getting deliveries.
You could send me a pack of paperclips and I'd probably be excited about it.
These lovelies have been brightening up my desk for almost a week now and are still going strong.


Did I mention lilies are my favorite flower?
Love that boy of mine.
{And just to brag on him a bit...he also gave me spa time during our trip to Mexico next month.  Color me the luckiest!}

Other fun gifts included:


...a cookbook that you will absolutely be seeing recipes from soon.


...a gift card to Sephora, where I found this little beauty.

I don't know about you, but my lips have been seriously struggling with the change of season.
If yours are too, I definitely recommend this stuff.
The lady at Sephora told me to put it on before bed {which I did last night}, and I woke up with lips that were no longer chapped!
This stuff is no joke.

I was also given a delicious new pumpkin candle {do my friends know me, or do they know me} and a pumpkin cream cheese cake that I have been nibbling on all week long.

Not a bad way to kick off 26!

A couple of days after my birthday, it was Joe's birthday.
Which I find really fun, because every year we get to celebrate together!

I wanted to try something new treat-wise this year, so I brainstormed and brainstormed {and brainstormed some more} and then it hit me.
My boyfriend is a chocolate monster.
Like if this was the movie Willy Wonka, it'd be a toss up who would drink the chocolate river first, Joe or Augustus Gloop.
So what could be better than chocolate stuffed with more chocolate and peanut butter?

Nothing, that's what.

I can't even really count this as a recipe {let's face it, I used box cupcakes...the epitome of lazy}, and I swear I wasn't even planning on sharing it due to my embarrassing lack of effort.
Note: I promise after this I will get back to actual recipes.
But when people started eating these, I knew I had made a mistake by not photographing them more.

When I get a lot of positive feedback on something, that's when I share it with you.
And "positive feedback" for these cupcakes is an understatement.

The understatement of the century, really.
People loved these.

You're going to laugh when you see how easy they are.


Things you'll need:

1 box chocolate cupcake mix {or make a homemade batter if you have time!}
22-24 Reese's peanut butter cups {normal size, not mini}
1 jar cream cheese frosting
Topping of choice

Preheat oven to 350 degrees.
Mix cupcake batter according to box instructions.
Put about 1 tablespoon of batter in each cup {enough to cover the bottom}.
Place 1 peanut butter cup in each cup.
Add more batter on top until cups are filled 2/3 of the way.

picture via
Bake according to box instructions.
Let cool completely, cover with frosting, and sprinkle on your topping of choice!
I used this amazing sugar/chocolate/coffee bean grinder from Trader Joe's.
But sprinkles {or even chopped peanut butter cups!} would be perfect too.

I told you you were going to laugh.
Embarrassingly easy.

So next time you want to really impress your friends, coworkers, or the cute boy with whom you reside, whip up a batch of these and bask in all of the praise you will inevitably receive.
Trust me on this one.

Monday, October 7, 2013

and speaking of birthdays...


It's this stud's birthday today.
The big 2-8.

If I had to share a birthday weekend with anyone, I'd want it to be you, lover.
Hope your day is as special as Friday was for me!
I love you!

More to come on my birthday activities, our weekend, and the Reese's-filled cupcakes I made to celebrate.

You heard that right.

Have a good Monday!

Friday, October 4, 2013

year 26


Today, I'm 26.

I can't believe it, honestly.
I don't feel a day over 22.
But here I am, grown and working and paying bills and living this adult life that I stumbled into somehow.

When did that happen?!

Today is going to be a busy day, but I just wanted to stop in and say thank you for reading along on my little corner of the internet.
I spent a lot of year 25 in the kitchen learning and experimenting, and this blog helped me organize my thoughts {and keep track of my successes} along the way.
I think I'm becoming a better cook because of it.

At the very least, I'm learning more and more about what I do and don't enjoy.
And that's really what your 20's are about in general, right?

Have a great weekend, friends!

Tuesday, October 1, 2013

a big georgia win {and some very promiscuous brownies}

Please tell me you watched the Georgia game this weekend.

If you didn't - spoiler alert - the Dawgs beat LSU 44-41 in what turned out to be one of the most exciting {and equally terrifying} games of the season thus far.

!!!!!!!!!!!!!!

Okay, freak out over.
But seriously, it was a great game.
And not just because Georgia gave us a big W.


Tickets to the game were incredibly expensive, so Saturday morning Joe and I decided to head down and spend the day tailgating with Kayla and Mark in their little town of Milledgeville.


I'm sure it goes without saying that we had a great time.
I wish I had more pictures to prove it, but needless to say, we were in celebration mode for most of the night.
Thanks again for having us, Kayla and Mark!

When we initially decided our plans for the weekend, I knew exactly what I wanted to make to contribute to the fun day ahead.

I found the recipe for slutty brownies on Megan's blog a couple of weeks ago and knew it'd make the perfect over-the-top treat for the next party I attended.

Before you read further, let me warn you.
If you're looking for a healthy tailgate snack, this is not the post for you.
You might want to just go ahead and click over to this or even these and just call it a day.

However, I will tell you that I'm a firm believer in having a treat every now and then.
And when I say treat, I mean treat.
None of this sugar-free, fat-free nonsense.

If you're going to have a cheat day, do it up right.
Make it worth it!
recipe via
Things you'll need:

1 roll of cookie dough
16 Oreos
1 box of brownie mix

*Note: You can absolutely make your own cookie dough or your own brownie batter for this - I went the easy route for time's sake!

Lightly grease an 8x8 baking dish.
Spread cookie dough evenly on bottom of dish.

Place Oreos in a single layer on top of cookie dough.

Carefully pour brownie mix on top and spread evenly with a rubber spatula.

Bake according to brownie package instructions.
My oven took about 10 minutes longer than the box suggested, but it wouldn't hurt to start checking it with a toothpick 15-18 minutes in.

Try your very best to let them cool {it's impossible, trust me} and enjoy!

I wish that I would've taken a time to get a better picture for you, but this was the best I could do.
Patience is something I could work on.
I will reiterate though - it's very important that you let them cool.
They will be easier to cut {and eat}, I promise.

Or you could do what Joe and I did and eat yours directly out of the baking dish with a fork.

Hey, we took the majority to Milledgeville.
Don't judge me.

What are you up to this week?

Joe is traveling until Wednesday, so I'm spending lots of time shopping for birthday gifts {what do you buy the boyfriend who buys himself everything?!}, eating this chicken soup, and taking the pup on lots of long walks.

Welcome back, October, I've missed you dearly.